3D rendering is a process of creating three-dimensional images from given data. A number of different algorithms can be used for this purpose, but the most common one is the ray tracing algorithm. In this blog post, we will explore the basics of 3D rendering and how it can be used to create stunning images. We will also touch on some of the challenges that beginners may face when starting out.
What is 3d rendering?
3D rendering is the process of creating a three-dimensional image from a set of data points. This data can be generated from a 3D model or other sources. Rendering is used to create images for both digital and print media.
There are many different types of 3D rendering, each with its own advantages and disadvantages. The most common type of rendering is ray tracing, which uses a mathematical algorithm to create an image from a 3D model. Other types of rendering include scanline rendering and rasterization.
3D rendering can be used for both still images and animations. In most cases, it is used to create images that will be displayed on a computer screen or printed on paper. However, it can also be used to create animations, which are often used in movies and video games.
What software to use for 3d rendering?
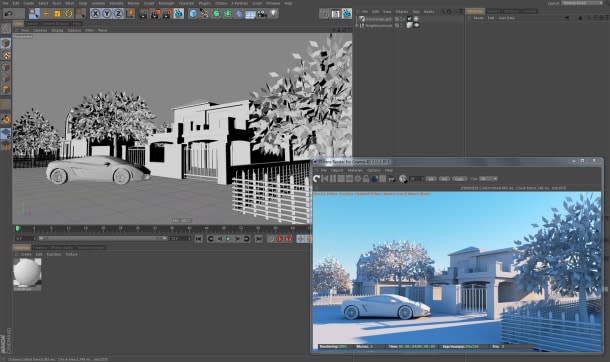
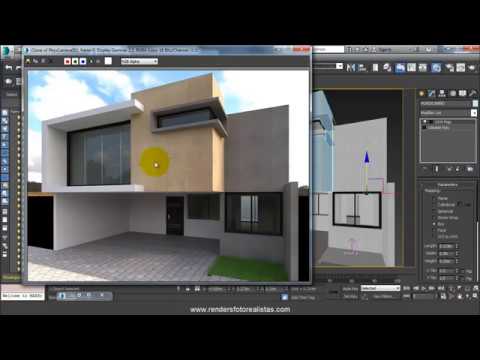
There are many software programs that can be used for 3D rendering. Some of the most popular ones include 3ds Max, Maya, Cinema 4D, and Blender.
When choosing a software program to use for 3D rendering, it is important to consider your needs and what you want to achieve with your renders. If you need a software program that is easy to use and has a lot of features, then 3ds Max or Maya would be a good choice. If you want a software program that is more affordable and has a wide range of customization options, then Blender would be a better option.
Once you have decided on the software program you want to use, it is important to spend some time learning how to use it effectively. There are plenty of tutorials and online resources that can help you get started with 3D rendering. With some practice, you will be able to create beautiful and realistic renders of your own!
How to create a 3d model?
If you’re new to 3D rendering, the process of creating a 3D model can seem daunting. But with a little patience and practice, you’ll be able to create impressive 3D models in no time.
Here’s a step-by-step guide to creating a 3D model:
- Choose the right software: Not all rendering software is created equal. Some programs are better suited for certain types of models than others. Do some research to find the best program for your needs.
- Sketch your idea: Once you have your software, it’s time to start sketching out your idea. This doesn’t have to be perfect – just get a general idea of what you want your model to look like down on paper (or in a digital file).
- Create the basic shape: Using your sketch as a reference, start creating the basic shape of your model. This is typically done with simple geometric shapes like cubes, cylinders, and spheres.
- Refine the details: Once you have the basic shape down, it’s time to start adding in the finer details. This is where things can get creative – add whatever details you want to make your model unique.
- Textures and lighting: Now that your model is complete, it’s time to add textures and lighting effects to really bring it to life. This step can make or break your render, so take your time and experiment until you’re happy.
Lighting and Texturing
In computer graphics, lighting and texturing are two of the most important aspects to creating realistic images. By adding light sources to a scene, you can create shadows and highlights that give depth and dimension to objects. Texturing adds surface detail, such as color and texture, that can make an object look more realistic.
In this section, we’ll take a look at how to add lighting and textures to your 3D models using Blender’s Cycles rendering engine. We’ll also explore some of the different types of lights and textures that are available in Cycles.
Camera Settings
We all know that lighting is critical to photography, but what about when you’re creating digital 3D renders? In this post, we’ll go over some key camera settings to help you get started with 3D rendering.
The first thing to keep in mind is that you’re working with a 3D environment, so your camera needs to be set up accordingly. In other words, you need to make sure that your camera is positioned in the scene correctly. You can do this by setting the camera’s location and target point. The location is where the camera is positioned in the 3D space, and the target point is what the camera is pointing at.
Once you have the camera positioned where you want it, you need to adjust the lens. The lens determines how much of the scene is captured by the camera. A wider lens will capture more of the scene, while a narrower lens will focus on a specific area.
Finally, you need to adjust the exposure settings. Exposure controls how light or dark your render will be. You can adjust exposure by changing the shutter speed, aperture, and ISO settings.
By following these simple tips, you’ll be able to get started with 3D rendering and create beautiful images.
Rendering Tips and Tricks
If you’re just getting started in 3D rendering, there are a few things you can do to improve the quality of your renders. Here are some tips and tricks to get you started:
- Use high-quality textures: This will make a big difference in the overall look of your render. Make sure to use high-resolution textures whenever possible.
- Use appropriate lighting: Good lighting can make or break a render. Be sure to experiment with different lighting setups until you find one that works well for your scene.
- Use post-processing effects: Post-processing effects can really make your renders pop. Be sure to experiment with different effects and find ones that work well with your particular style.
Conclusion
3D rendering is a great way to create realistic images of objects, people, or landscapes. If you’re new to 3D rendering, we hope this article has given you a good introduction to the basics. With practice and patience, anyone can create beautiful 3D renderings. So what are you waiting for? Start practicing today!